Your basket
There are no more items in your basket
Please call us on 01922 451 689
Opening Hours Mon-Fri 8:30AM - 5:00PM

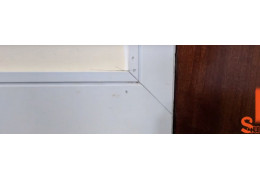
How To Paint Existing Skirting Boards
When it comes to Interior Design, your skirting boards and architrave might not be at the top of the list when it comes to your grand home designs, but freshly painted skirting boards can really add that finishing touch to your space and brighten up your room. This is also a great step to achieve a more updated and refreshed look without the need of replacing your skirting boards. The process of painting your existing painted skirting boards is a little different to new boards that aren’t fitted as you need to consider walls, furnishings and flooring. We have put together a helpful guide for you to use when painting your existing skirting boards should you want to give your boards a little bit of a refresh.
Steps To Painting Your Skirting Boards
When you buy new MDF skirting boards from us you can get the boards primed. This will mean that the board will arrive smooth with no rough edges. This is the goal you want to try and work towards with your existing boards to make the application of paint much easier.
1. Sanding
The best way to prep your boards ready for paint is to firstly start by sanding them down. This will help remove any scuffs and blemishes from the board and allow the paint to set better on the surface. This step is also particularly important if the current paint on your skirting has a gloss finish as it can be difficult to get paint to stick to this type of finish.
2. Cleaning
After sanding you will need to clean your skirting boards to ensure the surface is smooth and ready for a new application of paint. If you have a more intricate skirting board profile, then dust will no doubt have gathered in all of details of your board. Dusting and vacuuming should be the first step of cleaning as with these methods you can really get a large bulk of the dust build up with speed. You should then wash your skirting boards with warm soapy water to achieve a shiny finish. Why not check out our cleaning guide for more tips on how to keep your skirting boards looking fresh and clean.
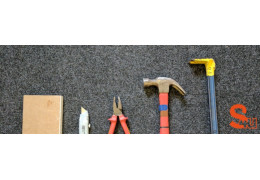
3. Prepare The Area
As well as prepping your actual skirting boards you will need to also prepare the room you are decorating. You will want to protect your walls, flooring or carpet and any surrounding furniture. We would recommend moving all of the larger furniture into the middle of the room so you have plenty of space to work with. To ensure a professional finish you will need to tape up your edges, you can just use masking tape for this. Outline the wall above the skirting and the flooring underneath with your tape, if you have carpets be sure to press the masking tape in so it sits snug against, the boards.
4. Priming
The final stage of preparation is to prime your skirting boards. Like the sanding stage this will help create a smooth base for your paint to be applied. This is a key stage before painting your final colour on to ensure you don’t get a streaky finish on your boards. You can get primer paint from your local DIY store and this can be easily applied with a brush.
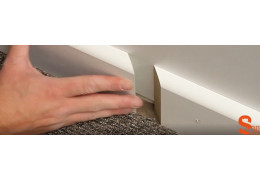
5. Painting your skirting boards
Once you have taken the necessary steps to prepare your existing board it’s time for the painting part. The key to painting skirting boards by hand is to remember that less is more. You want to apply thin, even layers of paint to your skirting boards to avoid drip marks and heavy build ups in certain areas.
To apply the paint we would recommend using a paintbrush around 2 inches in size, it’s also important to note if you have opted for a water based paint for your skirting boards you will need a brush with synthetic bristles. You should aim to only cover half of the brush with paint to avoid a build up of any excess.
The best method to opt when painting your skirting boards by hand is to start at the top taking particular care around the intricate parts of your board and the detailing. This will be the most difficult stage of the paint process and will require quite a bit of patience. You should work the paint over the boards in long sections to ensure an evenly applied finish. To improve the longevity of your boards we would also recommend applying a second coat of paint to ensure you get a high-quality finish that will last.
After both coats have dried thoroughly it’s time to put your place back together again and swoon over your refreshed skirting boards. This is an effective way of revamping your tired skirting boards in a way that is cost effective and fairly easy to do. You will be surprised at the difference a new coat of paint can make to your home.
Why Not Revamp Your Space With Skirting Board Covers Instead?
If however, you wanted to go further and completely transform your space then we would certainly recommend our skirting board covers. They are designed to go over any existing skirting boards you have and create a completely new look. Whether you decide to go for something more modern, detailed or simplistic we are certain a new skirting board cover will help you achieve your desired look and will save you the hassle of having to remove your current boards.
Browse our wide range of skirting board covers online to find a design you will love.
Related posts
-
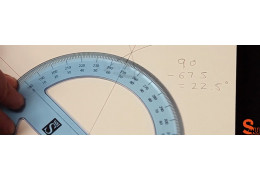 How to Measure and Cut a Skirting Board for an Internal Wall Joint by Bisecting
In this guide, we will showcase how to measure and cut skirting board for an internal wall joint by bisecting an angle.Read more
How to Measure and Cut a Skirting Board for an Internal Wall Joint by Bisecting
In this guide, we will showcase how to measure and cut skirting board for an internal wall joint by bisecting an angle.Read more -
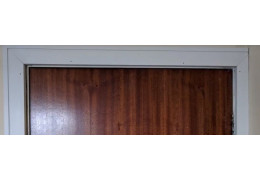 How to Fit Architrave When the Door Frame is Close to the Wall
Sometimes internal doors are so close to adjacent walls that fitting architrave is difficult. This tutorial will...Read more
How to Fit Architrave When the Door Frame is Close to the Wall
Sometimes internal doors are so close to adjacent walls that fitting architrave is difficult. This tutorial will...Read more -
 How to join two pieces of skirting board together on a flat wall
A tutorial showing how to join two pieces of skirting board together on a flat wall.Read more
How to join two pieces of skirting board together on a flat wall
A tutorial showing how to join two pieces of skirting board together on a flat wall.Read more -
 Step by Step Guide - How to Remove Skirting Board and Architrave
A video and written tutorial to show how to remove a skirting board.Read more
Step by Step Guide - How to Remove Skirting Board and Architrave
A video and written tutorial to show how to remove a skirting board.Read more -
 How to Join Square Groove Skirting Board and Architrave
One of the foremost attractions of the square groove/square groove 2 profiles is that the can be fitted so that the...Read more
How to Join Square Groove Skirting Board and Architrave
One of the foremost attractions of the square groove/square groove 2 profiles is that the can be fitted so that the...Read more